Some thoughts on plastic model brick painting.
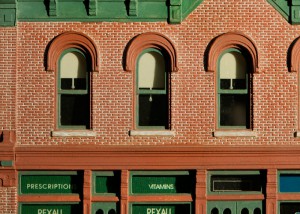
Working on some DPM kits I decided to dry brush brick faces after base painting the whole structure with a mortar color.
I think this does work pretty well but is very time consuming, if you are being careful not to get too much paint on the brush, so it does not run down into the mortar. I want to try some other methods including the Roberts Mortar, and see if it works as well and is quicker.
There also was an article in RMC or Model Railroader about washes of color for stone and brick, a short time ago that seemed really good, but I can’t seem to find it. Anybody remember an issue about this?
Author Archives: Bob Emmott
Train Shows
About to attend the Philadelphia Greenbergs train and toy show December 11 and 12. Has Been a while since I have gone to a Greenbergs show, so it will be interesting to see how the vendors and audience react compared to The Great Scale Model Train Show, held in Timonium Md 4 times a year, which I have attended, at least once a year, for the past several years. I’ll talk about that in a future post.
The Perils of Humidity
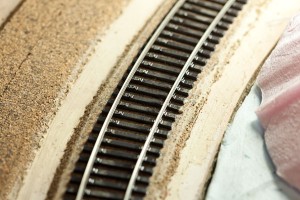
Jumping ahead a little just to relate an “oh no” realization about barge cement and the perils of east coast, Mid Atlantic basements and the changes in humidity and temperature. I laid a fair amount of Central Valley tie strips and Micro Engineering code 70 rail applied with barge cement. As you can see in the photo, the seasonal pressure to expand was too much for the barge to contain. To be fair, Central Valley’s new tie strips are molded with push over mechanical spikes and rail clamps, and this works very well. Sometimes the learning process does seem frustrating, but its all worth it. I have decided to use the NEW central Valley strips and also Micro Engineering code 70 flex track in hidden areas (tunnels,covered connectors, staging). I think it’s all an adventure worth taking.
The whole foam idea
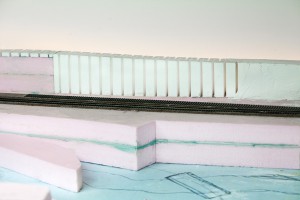
In deciding to go with the foam concept as the base for the layout, I continued to use layers of foam to both build scenery support and with Woodland Scenics incline sets, to create the rising and falling of the track supports to follow the land elevations. All of this again with foam compatible construction adhesive.
Framing Decisions
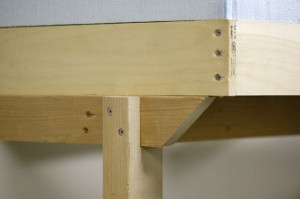
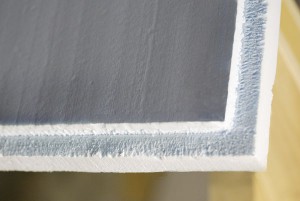
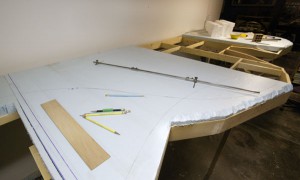
I decided to build the basic structure for the layout a little differently than most of the typical L girder or grid structures recommended. After deciding on the basic track plan (which I’ll put up on a later post) I built a frame work hung on the wall in back, and supported by legs somewhat set back from the front. I did this in sections 4 foot wide of 2x3s. Setting on this under frame is a 1×4 four foot wide frame with slightly recessed smaller section interior grid to support 2″ thick extruded foam, which I routed to fit these 1×4 sections, and drop down to contact the smaller sections. This foam is glued to all the members of the 1×4 frame with foam compatible construction adhesive. This gives 4 foot wide sections which are then fastened to the 2×3 under frame with cleats. In theory I could, at a later time take the layout apart in sections if it had to be moved. I stress the “in theory” part.
In the photos you can see the aisle edges of the sections are contoured, because of the track plan and the scenery to follow.
The whole thing is really pretty sturdy and rigid, and even stand able if you put a piece of plywood to stand on, so to spread out the weight. I’m 6’4″ and 200 lb., and I have no trouble with this so it really is possible.
Some History
My Dad showing me about building things, to my high school starting of so called “perfect track work” on an early train layout with my friend Joe Braun, to my college summer employment at a precision machine shop, and through a number of years of designing, building and photographing sets for Knex toys box covers, I came back to starting a layout with hopefully some life experiences and skills, to make an interesting and fun layout, that I would like to share, as I go along. Hope you enjoy and share your experiences as well.
Bob Emmott

